The Back Steps

The great re-doing is coming to a close. The painters have finally come back to remove paint from the places it doesn't belong and add a little to the places that need it. A cleaning crew has made the kitchen sparkle (it doesn't really show in pictures; you can just trust me that it sparkles). The tilers will be back soon to fix the places that the finish carpenter did too early (too arcane to even explain - just remember that each trade needs to work in the proper sequence and each trade must only do what is required to let the other trades work AND NOT TOO MUCH TO SCREW UP THE OTHER TRADES!).

Anyway, the last tasks before final inspection are installing the new dining room chandelier, and building code-compliant steps out the back door. I installed the chandelier last week and this weekend I built a set of back steps:

Stairs are hard. I just wanted to mention that in case anyone thinks that 3 little treads are a quick little task. OK, it would probably have gone quite a bit faster if I had built stairs anytime in my life before this...  I did manage to finish with materials bought in a single trip to the hardware store (Southern Lumber in San Jose - not an outstanding hardware store, but much better stocked in lumber than any Home Depot on the planet).

long view of the work in progress
close up of the skeleton
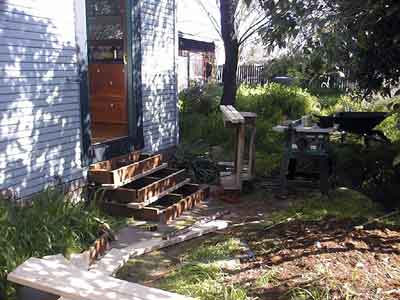
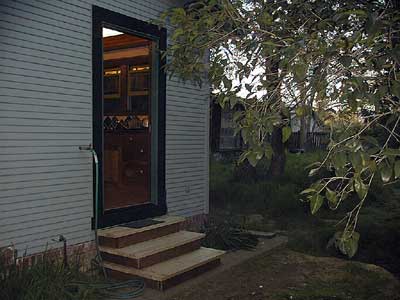
The first two photos show the steps under construction. To be honest, this is the morning of the second day. At the end of the first day, I had determined that something wasn't right with the run, but i was too tired to do anything about it.

You can see the old temporary stairs (which we have lived with and injured ourselves on for the last 6 months) on their side in the center of the left photo. a couple of 2x4s are resting on them - they made a handy work surface while I built their successors.
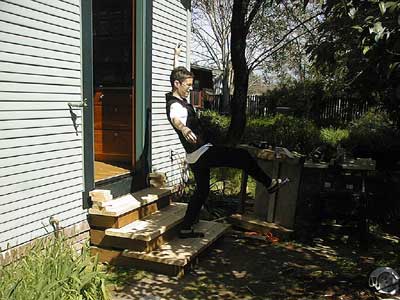
The photo above shows the design: instead of trying to cut a 2x10 into a proper stringer (way beyond my experience without several 2x10s to experiment on) I chose to build a series of 3 risers. One advantage of this approach is its simplicity: each riser is the same height as the others, so if you have a table saw with a rip fence (thanks Dave!) the pressure treated 2x6s (the dark wood in all the photos) is all ripped (cut lengthwise) to the same height (5"1/8" in my case).

Another advantage of this system is that the although the top of the steps is lag screwed into the rim joist of the house, the steps rest on the ground - all the structural members are in compression (except the treads, of course). I didn't invent this way of making steps - I just knew I wouldn't be able to make a more complicated (stringer type) stairway in a single weekend.
the finished product
Mary takes a fall
The photo above is the finished product.
Mary demonstrates the ease with which she can perform the well known yoga position: "small woman driving large car"


The new chandelier :
Mary and chandelier